Year: 2021

23 Dec 2021
Odyssey software Forms Module

Odyssey “How To” Series: Forms Module

Join us for week 12 of our Odyssey How-To series with Odyssey Implementation Analyst Katelyn Waters. This week, we take a look at the recently updated Forms module and answer some of your frequently asked questions.

Odyssey is a radiation safety software suite designed to help RSOs, EHS managers, and Radiation Safety Specialists manage affordable and efficient programs.

KB 00:11: Welcome to Part 12 of our 12-week How-to series highlighting Odyssey Radiation Safety Software. Today we’re back with Odyssey Implementation Analyst Katelyn Waters to talk about the Forms module. We’ll be addressing some frequently asked questions we get about the module’s functionality. Katelyn, I understand that the Forms module was recently updated. Can you tell us a little bit about that before we jump into the FAQs?

Katelyn 00:33: Absolutely, KB. The Forms module is in the upper left-hand corner here, and it is 1 of the 12 modules of Odyssey, which is a radiation software suite. It provides tools to build electronic forms. The advantage to using the Forms module instead of some of the alternatives like a PDF, word document, or paper form, is that when you’re filling out a form within this module of Odyssey, it can actually populate fields on the form with existing data that’s already in the software. For example, if you’re filling out a machine survey form and select one of the machines that was surveyed, you can automatically have information such as the machine’s serial number or the site of that machine added to the form.

I’m going to go ahead and navigate in and we can take a look at that before we get to some of your questions, KB. Once I do select that Forms module we have four main sections, which are Data Entry, Form Builder, Analysis, and PDF Templates. The Form Builder section is where administrators can come and create forms initially. Data Entry is where you fill out existing forms. They can also be linked to other modules of Odyssey to quickly access them so you don’t have to necessarily come to that section. Analysis has tools to compare multiple different responses to the same form over time, so you can analyze trends that are occurring, and PDF templates are used to format the header and footer of those forms once you convert those to PDFs.

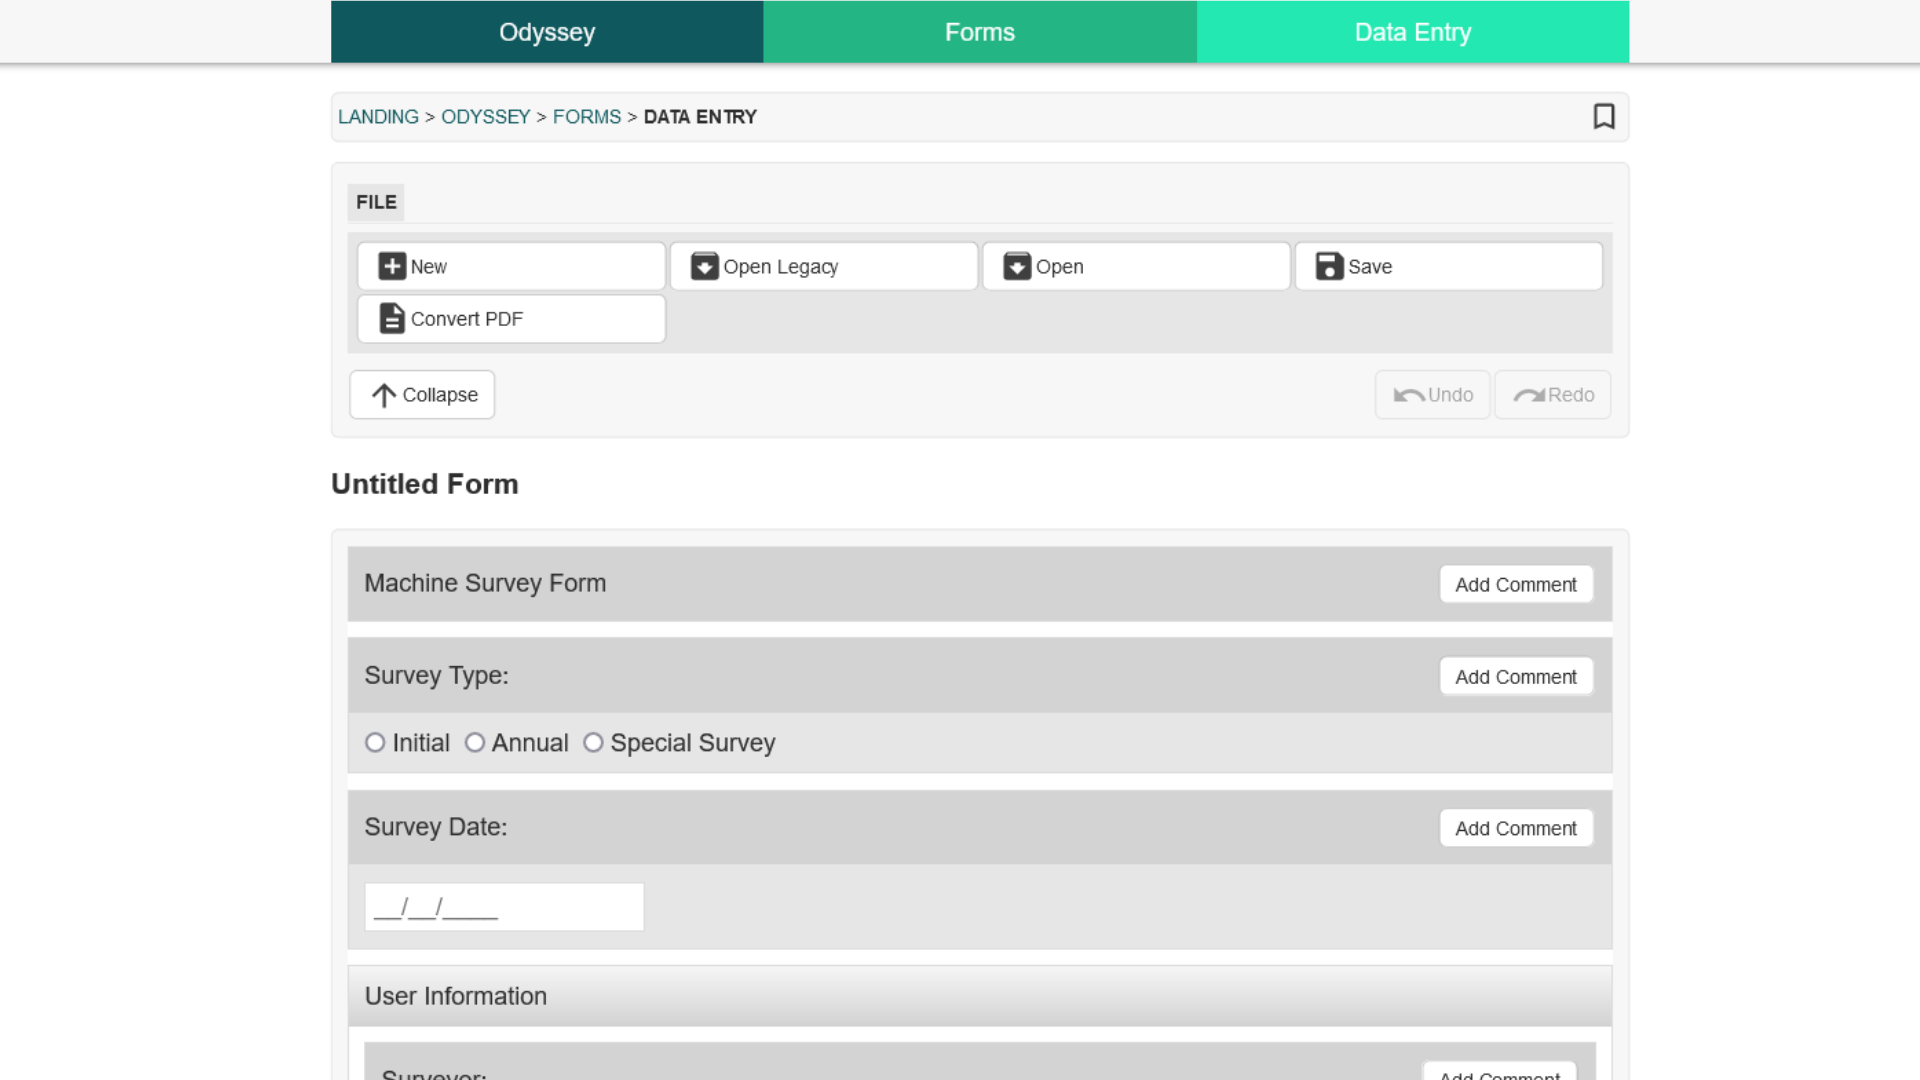
I’m going to probably focus on Form Builder and Data Entry today as these are the most frequently used sections. If I go into Form Builder, this is the initial screen that we see. We did recently update this module, as we talked about at the beginning here. The insert tab will allow us to add a variety of things to one of our forms. I can start with the heading, which will help me organize these other question elements that I can add to my form. And I’ll add a couple of examples so you can see what these look like here. While I’m in Form Builder, as an administrator, I have a variety of different tools that aren’t available in that Data Entry section where you fill out the form. I can change what these say, as well as my questions. For something like this here, which is what we call a radio question, I can also change the options that they can select from. This is a date question, so the user filling it out as we’ll see in a little bit here, can select a date from this date picker. And this is what we call a user question, where you can have a drop-down list of users from the account.

So that’s just a few items of different form elements that we’ve added here so you can see what that looks like. But if we wanted to take a look at a completed example, we can do so in Data Entry.

Selecting New I can fill out any of the existing forms we have. We have two example forms on this Demo Account, an audit checklist, and a Machine Survey Form. I’ll go ahead and select the latter. And on this form, we can see there’s definitely a cleaner formatting for someone visually to actually fill out this form. A lot of the question IDs we saw at the top of each question element, as well as some of the features, are not available here for them to edit the questions as we want this to remain a static form so you can compare it over time. I can come through and select different options as my answers, here’s that date picker I was talking about, user questions, you can have just text fields so they can enter letters or numbers there, or you can limit them to one or the other.

And the true strength of this form lies within these questions here which are going to pull data from the other modules of Odyssey, like I mentioned. This is a drop-down menu of all of the machines that are in the Machine Management module, and when I select one of those I can have it automatically populate other fields like the Serial Number here.

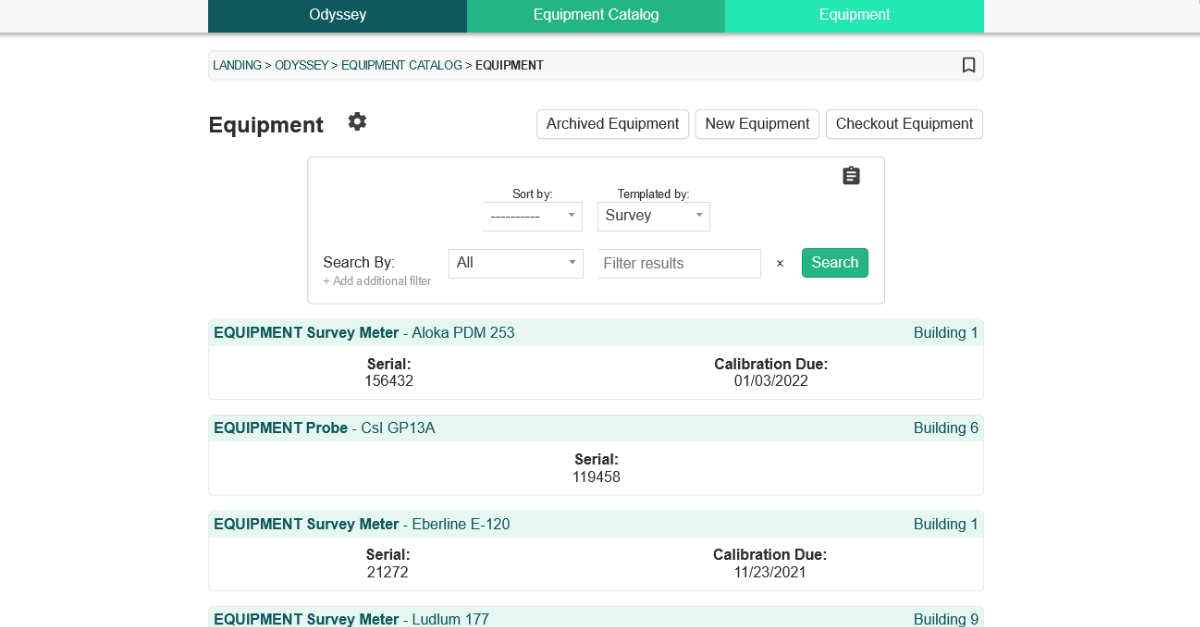
Same thing with Equipment Catalog. If I want to choose the instrument that was used for the survey I can. Also another example of the serial number, but there’s a lot of other data besides that particular field that you can fill out in that manner. We also have images and the ability to edit those. These at the top are Canvas tools from the Canvas module where you can come in and do some simple image markups to this while you’re actually filling out the form. This form also has a table, as well as a place for a signature at the bottom for this example.

KB 05:30: That looks great. The module has really improved visually, and I like all the options for what you can actually include on a form. Speaking of that, what are the more common forms that you see created in the module?

Katelyn 05:42: I’d say the most common use cases we’ve seen so far are for area surveys because you can upload a floor plan like this example stock image here that you can actually edit and markup with your different survey points that you were surveying at throughout the survey. We also have the ability to do inspections and audit checklists which we see frequently done, as well as machine surveys like this example form that we’re looking at. In addition to those, the module is pretty flexible, you can recreate most of your needed forms here.

KB 06:15: One of the questions we get since we market the software as mobile-friendly is if forms can be filled out on a mobile device, like a phone or tablet. Is this possible?

Katelyn 06:27: Absolutely. So that’s one of the biggest strengths of this module. As long as you have an internet connection, you can access these forms to be filled out on your mobile device. They can even be accessed on a screen as small as your phone, which I have used before myself, and they are still definitely usable there. Although I highly recommend using a tablet because you still get that portability along with a larger screen size. We see a lot of our clients filling out forms while they are out in the field with tablets. They might be doing a survey, audit, or inspection like I mentioned, and then you can immediately get that information electronically instead of going back to the office and doing it afterward or having a paper copy that you took with you.

And in addition, it’s really nice if you have a tablet pen as well because for these images down here where you want to do markups–I’m on my desktop right now, I can just use my mouse, right–but when you’re out in the field it’s nice to have a tablet so you can mark up the images.

KB 07:25: I can definitely see how that would be more efficient than doing it on the desktop when you’re out walking around in the field. Once the forms are filled out, I noticed the save button at the top of the page. How are the completed forms accessed?

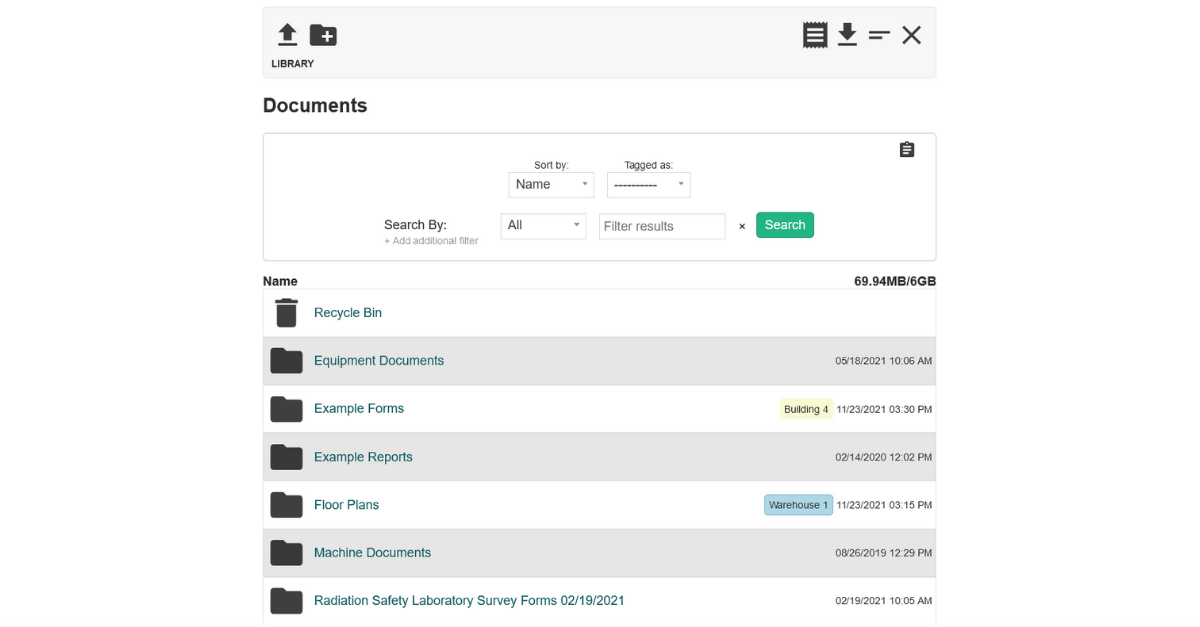
Katelyn 07:38: Good question. Once you save these forms, they can still be accessed here in the Data Entry section of Forms. However, they can also be linked to other areas of Odyssey. One of the most commonly used areas to link these forms is on Lab Profiles. If you have a lab survey that you’re routinely doing, you could have a saved template in the Form Builder section there, and you can just click on that to fill into ut each time you need to do a lab survey. So then you’ll have that whole survey history in one place on those profiles.

KB 08:10: Great! And that wraps up our list of frequently asked questions for the Forms module. Thank you Katelyn, for walking through the module with me and clarifying how users can use it to create and fill out forms that are usable in their Radiation Safety program.


Schedule an in-depth demo with our Odyssey team to discuss how the software can assist you with your radiation safety management needs.

14 Dec 2021
Odyssey's Document Library Module

Odyssey “How To” Series: Document Library Module

Join us for this week’s edition of our Odyssey How To series with Odyssey Implementation Analyst Katelyn Waters. We discuss how to carry out certain functions of the Document Library module and answer some of your frequently asked questions.

Odyssey is a radiation safety software suite designed to help RSOs, EHS managers, and Radiation Safety Specialists manage affordable and efficient programs.

KB 00:11: Welcome to Part 11 of our 12-week How-to series highlighting Odyssey Radiation Safety Software. Today we’re back with Odyssey Implementation Analyst Katelyn Waters to talk about the Document Library module. We’ll be addressing some frequently asked questions we get about the module’s functionality and its use in storing documents. Katelyn, do you mind giving an overview of the Document Library module before we get into our FAQs?

Katelyn 00:32: Absolutely, KB. The Document Library here is going to be 1 of 12 modules of Odyssey’s radiation safety software suite. It’s a cloud document library that can be accessed and shared by all of the different users on the Odyssey account.

KB 00:49: This module is very straightforward and very user-friendly, but we do get a couple of questions about some additional features that the Document Library has that maybe other file management systems may not. One of those features is the tagging system. Can you describe a little bit about what that is?

Katelyn 01:07: Sure thing. If I navigate into the module, we can see that the toolbar for the library here has a few different icons. We have an upload icon that allows me to upload an additional file to the library, we have an icon to add a new folder for organization purposes, a download icon to download a file, or a folder’s contents. This right here when I scroll over it is to rename the selected file or folder, and then delete the selected file or folder. The tagging system relates to the icon here which says Set Tag for Files. If I come down and look at the documents I have in my document library, an example we already have tagged here is this floorplans folder. It has Warehouse 1 to the right of that as a label, that’s what we call the tag, and it’s essentially saying that all of the documents, in this case, floorplans, are pertaining to Warehouse 1. I can go ahead and do that with something else, if I want to tag this example forms folder, I can right-click on that, set tag, choose my site–this is pulling from the list of sites in Odyssey—select update tag, and it’s going to apply that to that folder there.

KB 02:28: Gotcha, thank you. So, since this is a shared document library for everyone on the account, another question we get from users is if there is a way to keep documents private. Is there a feature like that in Odyssey?

Katelyn 02:40: Great question. Each individual user actually has their own version of this document library, as well. They can get to it by scrolling over their name in the upper right-hand corner and going to “My Documents.” It has the same exact toolbar as the one we’re looking at right now, the same file management system, but it’s going to be a personal version of this cloud document library. It does have some tools to move things from that library to the shared library, say if you’re working on a document and then you’re ready to share it with others in your organization you can then move it to the Document Library module.

KB 03:13: Gotcha. One final question. Once documents are stored in the Document Library, are they accessible throughout Odyssey or just through this module?

Katelyn 03:23: The documents themselves can be accessed in Odyssey’s other modules anywhere that you are prompted to upload a file. For example, if I go back to the main Odyssey page and go into Equipment Catalog if I navigate to an Equipment Profile there’s a place for me to upload a document. So I just selected a random probe that we have in our inventory here. But if I come down there’s an Upload Equipment Document button, and there are various buttons like this throughout Odyssey that are prompting you to upload documents. Once selected you have the option to upload a document through the local computer, but you can also pull directly from the Cloud Library. And you’ll see that these are the same exact folders that we were just looking at in the Document Library module. If there’s a particular document that I want to associate with this probe, say it was calibrated, I can then associate its calibration certificate by pulling that document from the Document Library and selecting submit to upload that to the Probe’s profile, which you can now see down below.

KB 04:32: That seems useful for providing easy access to documents no matter where you’re at in the software. And that wraps up our list of frequently asked questions for the Document Library module. Thanks for joining me today, Katelyn.

Katelyn 04:42: Thanks for having me, KB.


Schedule an in-depth demo with our Odyssey team to discuss how the software can assist you with your radiation safety management needs.

08 Dec 2021
Odyssey Equipment Catalog module

Odyssey “How To” Series: Equipment Catalog Module

Join us for this week’s edition of our Odyssey How To series with Odyssey Implementation Analyst Katelyn Waters. We discuss how to carry out certain functions of the Odyssey Equipment Catalog module and answer some of your frequently asked questions. Scroll down to view the full transcript.

Odyssey is a radiation safety software suite designed to help RSOs, EHS managers, and Radiation Safety Specialists manage affordable and efficient programs.

KB 00:11: Welcome to Part 10 of our 12-week How-to series highlighting Odyssey Radiation Safety Software. Today we’re back with Odyssey Implementation Analyst Katelyn Waters to talk about the Equipment Catalog module. We’ll be addressing some frequently asked questions we get about the module’s functionality and its use in managing equipment inventory. Katelyn, do you mind going through an overview of the module before we get to our frequently asked questions?

Katelyn 00:30: Of course, KB. The Equipment Catalog module is 1 of 12 modules of Odyssey’s radiation safety software suite, which is what we’re looking at right now. It’s very customizable and can be used to track any type of equipment whether it’s something in your radiation safety or EH&S program. If I navigate into the module and into the Equipment section, which we’re going to be focusing on today, we can see that for this example or demonstration account we have the equipment types of survey meter, probe, protective apron, and thyroid collar. And these are those customizable groups. This is going to look entirely different depending on your account and what your needs are for your program.

If I select one of these names for a piece of equipment’s name, it’s going to take me to its profile which is what we’re currently looking at right now. I selected a survey meter. The boxes at the top of the profile for the survey meter are going to be the same as all other types of equipment, these are some pretty standard default fields. They are serial number, which is going to be the Unique ID for it in the system, the site or location that it’s at, an owner or responsible person, that’s Leann here, you can optionally associate it with a permit, and there is a last updated field which Odyssey automatically updates for you. Down below, where it says template fields survey meter, these are going to be customizable fields specific to that type of equipment, to that survey meter. And these are going to change depending on what kind of equipment you’re looking at and is something that is different depending on the equipment profile, which we’ll see in just a second.

For survey meters on this example account, we’ve decided to keep track of manufacturer, model, and some calibration information which you can see Calibrated by and the Calibration Due Date here. But if I go to a different kind of profile, we’re going to filter our results to some Protective Aprons here, we can see like I said that at the top here there is those same fields as what we saw on the survey meter. But down below it says Template Fields: Protective Apron now, and while there is some overlap, because you can, like with manufacturer here, we have different information for the other two fields, those being Lead Equivalency and some inspection due date information.

KB 03:07: So how do these templates get set up?

Katelyn 03:10: This is something that happens during what we call the implementation process of Odyssey. Versant staff are going to work with you to figure out what kinds of equipment you have for your program and what information you’d like to keep track of for them in Odyssey itself. We will then set up the groups and that information for you, those fields, but Administrators anytime later can edit them, add or remove any of those as need be.

KB 03:36: And what is that update button down there next to the calibration due date for?

Katelyn 03:40: The update button right here allows you to update any due dates like this calibration due date very quickly. For the survey meters on this account, we have the calibrations set up to be required annually. If I select this button right now, it’s going to populate with today’s date. And if I select Update it’s going to add a year to that date as it’s trying to project out when that next calibration due date is. You can also actually put in whatever date if the calibration didn’t happen today.

The due date itself also shows up in your scheduling calendar and will send you reminders that show up as Alerts in Odyssey.

KB 04:16: That sounds useful. And if I have a calibration certificate or other document that relates to my equipment, is there a place to store that?

Katelyn 04:25: Yes, if you scroll down on an equipment’s profile, which we can do for this meter here, there is a spot at the bottom of the page that has an Upload Equipment Document button. I can select that and upload something from the Document Library of Odyssey or my local computer, as well as I can see all of the other documents that were previously uploaded.

KB 04:46: Okay great. I just have one more question. Looking at the tabs on the equipment’s profile, I know we’ve described some of the others in our How-To series, but that Checkout tab seems to be unique to equipment. Could you describe what that’s for?

Katelyn 05:02: Absolutely. One of the key differences between the Equipment Catalog and Machine Management modules is that equipment tends to be a little bit more portable, changing hands or ownership more frequently. And you need to keep track of that in much more detail than you would for a larger machine that is mostly stationary.

We added in the checkout tab for this purpose, and it shows you a history of who’s checked out this equipment, where to, and when they checked it back in. We can see for this survey meter here, Leann has checked out the equipment to a certain building as well as checked it back in. And those are logged on the history, and we also have tools to create a new check out here if we’d like to.

KB 05:47: Awesome! And that wraps up our list of frequently asked questions for the Equipment Catalog module. Thanks, Katelyn, for walking through the module with me and clarifying how users can use it to manage their equipment inventory.

Katelyn: 05:57: Thanks for having me, KB.


Schedule an in-depth demo with our Odyssey team to discuss how the software can assist you with your radiation safety management needs.

02 Dec 2021
Odyssey's Canvas module

Odyssey “How To” Series: Canvas Module

Join us for this week’s edition of our Odyssey How To series with Odyssey Implementation Analyst Katelyn Waters. We discuss how to carry out certain functions of the Canvas module and answer some of your frequently asked questions.

Odyssey is a radiation safety software suite designed to help RSOs, EHS managers, and Radiation Safety Specialists manage affordable and efficient programs.


Schedule an in-depth demo with our Odyssey team to discuss how the software can assist you with your radiation safety management needs.

24 Nov 2021
Odyssey training module

Odyssey “How To” Series: Training Module

Join us for another round of our Odyssey How To series with Odyssey Implementation Analyst Katelyn Waters. We discuss how to carry out certain functions of the Training module and answer some of your frequently asked questions. Scroll down to view the full transcript.

Odyssey is a radiation safety software suite designed to help RSOs, EHS managers, and Radiation Safety Specialists manage affordable and efficient programs.

KB 00:09: Welcome back to our 12-week How-to series highlighting Odyssey Radiation Safety Software. We’re back once again with Odyssey Implementation Analyst Katelyn Waters to talk about the Training module. We’ll be addressing some frequently asked questions we get about the module’s functionality as well as its use in training personnel. But before we get into our frequently asked questions, Katelyn do you mind giving us an overview of the Training module?

Katelyn 00:33: Absolutely, KB. The Training module is 1 of 12 modules of Odyssey, which is our radiation safety software suite. It’s been developed so that administrators either for a radiation safety program or EH&S programs can easily create training courses for their own personnel. We’ve seen these courses used either as the sole method of instruction or as a supplement to live, in-person training.

If I navigate into the module, there are going to be 3 main sections for us: Manage Users, Manage Courses, and Results. If I go to Manage Courses, we can actually take a look at one of the example courses that we have added to this demo account called Medical X-ray.

The left-hand side has a customizable description of that course, and this is something that an administrator would add. And the right-hand side will show us a breakdown of the course. Each of these training courses is broken down into as many modules and chapters as you would like, and you can name each of those as well as have content like lecture videos, documents, and a quiz form for each of the chapters.

KB 01:42: And how do admins go about creating these courses? Also, what kind of content are you able to include?

Katelyn 01:48: Yeah, so you go about creating these courses from the previous page under Manage Courses, and so instead of selecting one of our existing courses here you’d hit the big New Course button. After that, you’re going to be prompted to upload content for your course; each chapter will have its own content. Chapter 1 that we’re looking at has lectures that we have previously uploaded to the chapter as well as there is a supplemental document for this chapter. And you would go about adding those initially from a page that looks like this one right here. Right now I’m editing the chapter but this is the same form you’re going to see when creating a new chapter. You’re going to have the chapter title that you can enter or edit, a description that you can put in, and then a box here that you can click and drag or click to upload any of those resources. If you have a video, you can add a PowerPoint, documents like PDFs, or Word Documents.

And then at the bottom, we’re going to have the existing resources that are already part of this chapter. The two videos that we saw are listed right here that have been previously uploaded, and then that document that we viewed is this document right here. I can edit or delete any of those if need be.

KB 03:07: That’s great. Is there a similar process for the actual quiz creation?

Katelyn 03:13: When we’re creating quizzes we have some tools within the Training module to go about creating those. I’m going to go to this Chapter 2 quiz. Right now what we’re looking at is the student view of the quiz, there are all multiple choice questions for this one and this is the format of what they’re going to see. But an administrator either creating or editing one of these quizzes is going to have this view here where you have multiple buttons. You can add multiple-choice questions to your quiz, True/False, short answer, or something called a Worksheet, which is going to be a form from our Forms module that you associate with this quiz. And once you do select one of those buttons you will have a question added to your quiz that looks like this. You will type in what the actual question is, what options you want this student to be able to select from, and the correct answer.

KB 04:07: I see that there are some other settings right there at the top of the page. What exactly are those settings for?

Katelyn 04:12: That’s a great question. The passing percentage right here is the percent of questions that the student needs to get correct in order for this quiz to be marked as completed, or passed. If the student does not pass that particular quiz, there is a lockout period which is optional. We do set this for our quizzes. The purpose for that is to encourage the student to go back and review that material prior to taking the quiz again so they’re not just taking it over and over again until they pass it. You can also set the number of attempts that they’re allowed to do for each quiz. The -1 that you see here is unlimited. We allow them to take that over and over again even though there is a lockout period, but you could set this to 2 or 3 attempts, whatever you would like.

The final box is Questions Per Quiz. This allows you to create a pool of questions that each quiz attempt will pull from. If you want to, as an administrator, add in like 30 different questions for this quiz, but when a student takes it you want it to pull maybe 10 of those questions out, you can put 10 here, and then it will pull from that overall pool of questions.

And finally, we have this checkbox “Show Answers on Failure.” If a student does not pass that quiz you can then determine with this checkbox if you want to show them the correct answers then.

KB 05:34: And am I able to see what students answer for the quizzes and track their progress on my end?

Katelyn 05:44: Yes. Let me go back out to the other two sections that we have not viewed so far in Training. And those are going to be Manage Users and Results.

Briefly taking a look at that Manage Users section for that same course we were just looking at, the example Medical X-ray course, we can see the students who are assigned that course, when they were assigned it, when it’s due for them to complete, whether or not they completed it, and we can also take a look at their course completion certificate from here if we wanted to. We can optionally also unassign any of them, or assign additional Odyssey users at the bottom of this page.

But to more directly answer your question, in addition to this section, we have the Training Results. The Training Results section has each of your courses listed out, the students that have taken it at any point in time, as well as, if you select one of their names, you can view how they responded to each of the quizzes that are included within that course. We have Vincent Goble here, who has previously taken the Medical X-ray course, and his scores tab has all of the chapters that he has completed. So, so far, he’s only completed Chapter 1. And we can see what each of the questions were for that Chapter 1 quiz, how he responded, as well as the correct answer. And we can see one of them here we can see he did not answer correctly even though he did pass, and that’s this one in red and it’ll be labeled very clearly for you.

This is a very easy way to track progress for each of your students as they progress through the course. But you could also just wait until they complete the course because at the end of that course each student is going to have available to them a course completion certificate, which they could provide to you to keep in your records as proof of their completion.

KB 07:31: That sounds very easy and efficient! And that wraps up our list of frequently asked questions for the Training module. Thanks Katelyn, for walking through it with me and clarifying how users can use it to train personnel in their Radiation Safety or EHS program. We’ll see you next week for a discussion on Odyssey’s Waste Management module.


Schedule an in-depth demo with our Odyssey team to discuss how the software can assist you with your radiation safety management needs.

17 Nov 2021
Waste management module screenshot

Odyssey “How To” Series: Waste Management Module

Join us for week 7 of the Odyssey How To series with Odyssey Implementation Analyst Katelyn Waters. We discuss how to carry out certain functions of the Waste Management module and answer some of your frequently asked questions. Scroll down to view the full transcript.

Odyssey is a radiation safety software suite designed to help RSOs, EHS managers, and Radiation Safety Specialists manage affordable and efficient programs.

KB 00:11: Welcome to Part 7 of our 12-week How-to series highlighting Odyssey Radiation Safety Software. We’re back with Odyssey Implementation Analyst Katelyn Waters to talk about the Waste Management module. Today’s discussion will address some frequently asked questions we get about the module’s functionality, specifically its use in managing radioactive waste. Katelyn, do you mind giving us an overview of the Waste Management module?

KW 00:33: Absolutely KB. The Waste Management module here is 1 of 12 modules of Odyssey. It can help track location, activity, and disposal of any radioactive waste in your program. It directly connects with another of Odyssey’s modules, that being Inventory Tracking, and you can actually transfer materials from inventory tracking to waste management. If I navigate into this, we can see that there are six main sections: Sites, Locations, Transactions, and then three for containers.

Sites is where you can mark any of your existing Odyssey sites as somewhere that houses radioactive waste. Locations, you can designate more specific areas at those sites. And Transactions we’ll come back to, but we have three different types of containers: Open, In-Transit, and Closed.

Open is going to be waste containers that are located where ever radioactive materials are being used, where it’s actively accumulating. This could be a lab, a hospital, somewhere where there’s a waste container that’s being filled. Once that is filled or is ready for being transported, you can mark the container as In-Transit and it will get moved to this section or category. And once it’s at its final location if that’s going to be decaying on-site, somewhere where it’s awaiting disposal, if you’re transferring it completely off-site, it will be then moved to the Closed Container section. When the containers arrive at a waste site, they can be marked as closed.

KB 02:09: So you mentioned that you can move inventory from the Inventory Tracking module to Waste Management. Does that add the materials to a waste container here? Where do those materials go?

KW 02:21: Yeah, that’s a great question. I’m going to navigate back to the Odyssey page and actually go into Inventory Tracking for us. And you can dispose of materials either from Inventory Holdings which is our unsealed sources section, or from the sealed sources section. If you go into either of those you’re going to have a button at the top of the page that says “Dispose of RAM” or for the other sections “Dispose of Sealed Sources.” When you click that, you’re going to have a couple different options here. You can select which radioactive materials you’d like to dispose of, which sealed sources you’d like to dispose of… I’ll actually choose one for us here. And then your container option.

To clearly answer your question, yes, it’s going to be moved to one of the waste containers in the Waste Management module. This can either be an existing container that you want to select from or you can add a new one during this process. I’m going to select existing and choose one. Then once we select submit, it’s going to transfer that material to Waste Management and archive it in the Inventory Tracking module. So you’re still going to have a record of it in Inventory Tracking, it’ll be an Archived profile, but the material itself is going to be moved to that open waste container. We can see that it’s open by this word here in Waste Management.

KB 03:47: I can see that the material that you transferred under Waste Materials, and that there’s other material already added to the waste container. Is there a limit to how many materials you can add?

KW 03:59: You can add as many materials as you would like, that’s going to be this section here for anyone watching the video today. And, you can see that there are a variety of things added, like you mentioned KB. You can have a variety of different isotopes as well, we have quite the combination here. It’s going to track each individually. There’s an estimated current activity column, which is this one, this is going to go off of the reference date and activity that you already have in the system, as well as the half-life of that isotope, to consistently calculate out what that activity is at this moment.

For the overall container you’re also going to have this piece of information here, Projected Decay Date. This is going to take into account all of these different isotopes, what they are, what their half-lives are, what their current activity is, and try and estimate for you when all of that container’s contents are going to be approximately 0 activity. And we can see this one’s pretty far out based on the isotopes we have within this container.

KB 05:03: OK, great. And the Documents and Comments tabs are self-explanatory, but what is the Labels tab of the profile for?

KW 05:10: This is a tool that we have available actually for any item in Odyssey that has physical inventory associated with it, whether that’s going to be machines, equipment, any of the radioactive materials in inventory tracking or the waste containers like we’re looking at now. And what you can do is add in information from the profile, from this General tab, to a label that you can print out and affix to that waste container.

If I go ahead and look at this section right here I can select Variables. Once you select Insert it adds it to that label for you. I’ll go ahead and put in a few things here as some examples. After you add those it’s going to give you a print preview of what that would look like for the particular container that you’re looking at. This is the Unique ID for that container, the Location it’s at, as well as the QR code. The QR code is really nice because if you were to print this out and put that on that waste container, once you scan this QR code, it contains the URL for the profile and so it will take you directly here to this page of the profile.

KB 06:20: That seems like it would be really useful during inventories. I just have one more question. Do you mind explaining what transactions are and why they’re listed on this page? We didn’t cover that in the overview of the module.

KW 06:33: Sure thing. Definitely meant to get back to that as well. So Transactions are going to be used to move containers between those three different categories: Open, In-Transit, and Closed. You can also use them to mark containers for other actions that might have happened, whether that’s going to be an inventory that occurred, surveys, or a disposal method.

To do so, I can actually go back to that main transaction section, or there’s also this Perform Transaction button which is going to be available on all these container profiles. If I select that we have a form to fill out. It’s going to automatically populate with today’s date. I can choose what’s happening, this is a custom list for the account. For this example one we have just some disposal options listed here, some transit received options, as well as the one I’ll choose for example is survey.

If I select a waste site or waste location, it’s going to perform this operation on anything located at that site or at that location. Or, I can select them independently, select containers independently, here. If you come from a container profile like we did it’s going to populate that container in for you, which is the number 30 container. Once you’re ready you can select Submit. What it does is it performs that operation on the container for you. And it will put that in the history of waste transactions like this table list. So, we can see that container 30 was surveyed, the person that actually submitted that, as well as the date. And if we navigate back to the waste container profile, this is the same one we were looking at before, and scroll down, we have a waste transactions section where we can see that there are several things that have happened previously but we have the one that we just added in here from today’s date.

KB 08:27: Alrighty. And that wraps up our list of frequently asked questions for the Waste Management module. Thanks Katelyn, for walking through the module with me and explaining how users can use it to manage the movement and disposal of their program’s radioactive waste.


Schedule an in-depth demo with our Odyssey team to discuss how the software can assist you with your radiation safety management needs, or visit our website to learn about Odyssey’s other radiation safety modules.