Category: Inventory Tracking

03 Nov 2021
Odyssey incident management dashboard

Odyssey “How To” Series: Incident Management Module

Join us for week 5 of our Odyssey How To Series with Odyssey Implementation Analyst Katelyn Waters, where we discuss how to carry out certain functions of the Incident Management module and answer some of your frequently asked questions.

Odyssey is a radiation safety software suite designed to help RSOs, EHS managers, and Radiation Safety Specialists manage affordable and efficient programs.

KB 00:10 Welcome to Part 5 of our 12-week How To Series highlighting Odyssey Radiation Safety Software. Today weā€™re back with Odyssey Implementation Analyst Katelyn Waters to talk about the Incident Management module. Weā€™ll be addressing some frequently asked questions we get about the moduleā€™s functionality and its use in recording incidents. To get started, Katelyn, can you give us some background on the Incident Management module?

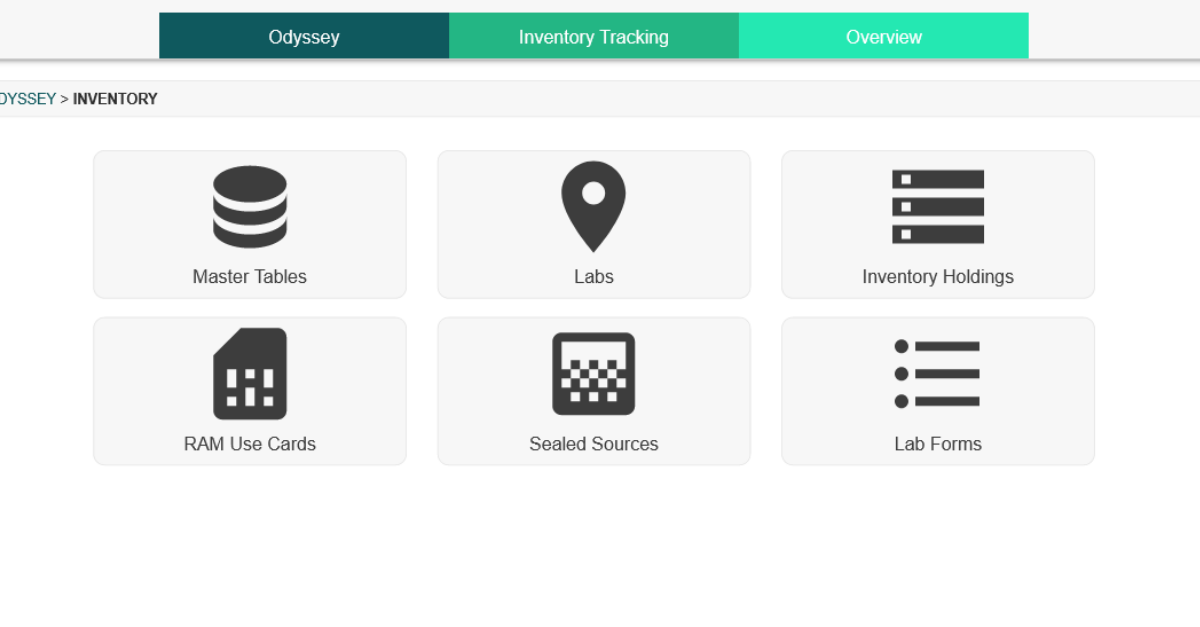
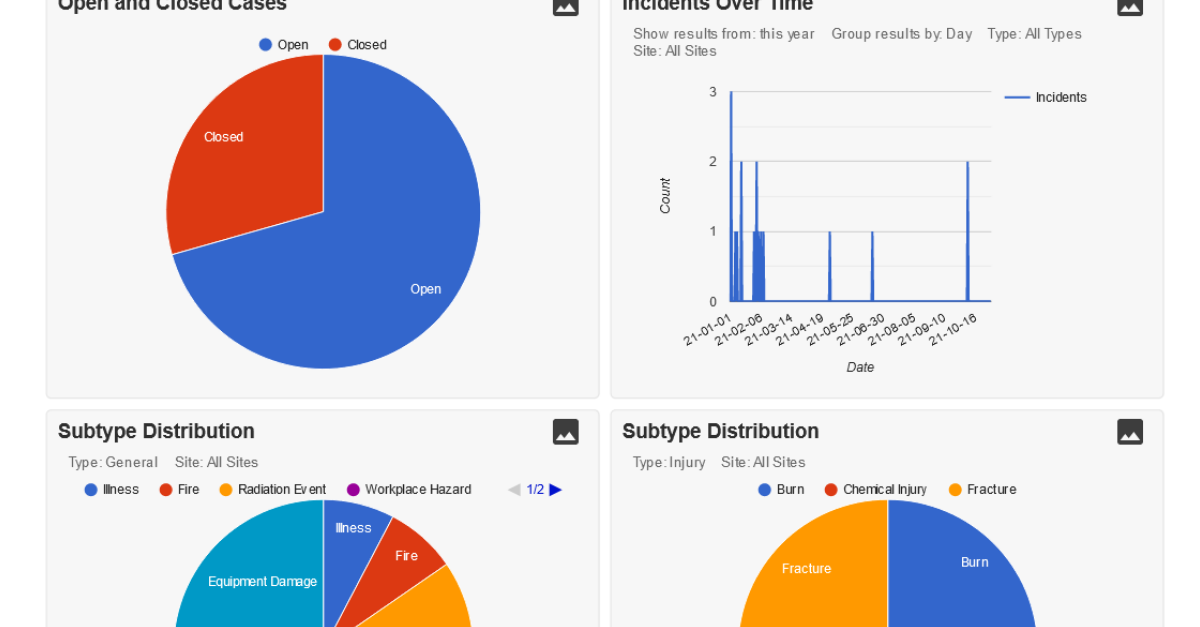
Katelyn 00:30: Absolutely. The Incident Management module is the most recent addition to the Odyssey Radiation Safety Software suite. Itā€™s located in the bottom right-hand corner here. It can be utilized for your radiation safety program as well as more generally for environmental health and safety. It allows you to track incidents such as radiation events, injury, illness, equipment damage. And if I navigate into the module itself, we can see it has a dashboard that is very similar to the Personnel Dosimetry module, which allows you to see at-a-glance the number of open and closed cases that you have for your account, a breakdown of those incidents over time, as well as a subtype distribution for what kind of incidents are occurring in those total numbers for you.

KB 01:26: So is this like the Personnel Dosimetry dashboard in that I can also edit which widgets are displayed?

Katelyn 01:33: Yes. By popular request, we actually built this to have a lot of those similar features. And if I select this gear icon, I can add additional widgets via this Widget Select. I can remove any. So, this is a bulletin one here that allows you to add some news memos for users to see. But if I donā€™t want to utilize that I can always remove any widget as well. I can click and drag to move them around; I can also change the individual settings I want to see.  I just added in an example incident here, so weā€™ve knocked this down to zero days since the last incident. But I can also filter that to different types of incidents, different sites, as well as other graphs such as incidents over time allow you to select the time period and other settings.

KB 02:10: Well, thatā€™s great! Um, I see on this page that the incidents are broken down into something called subtypes. Are these built-in options or are they customizable?

Katelyn 02:31: That is a great question. So, these are customizable, and if I use the navigational menus at the top of the page, I can go to a section called Case Subtypes. And this demo account has a variety of options that have been added. We have different injuries such as burns, chemical injuries, fractures, as well as some other items such as illness, fire, radiation event, near misses, workplace hazards, and equipment damage. And these are completely added as just examples. They can be customized for your program and the line of work that you might encounter.

KB 03:12: And how would I go about adding one of these incidents to the module?

Katelyn 03:19: Similarly to how we go to the case subtype, we can also go and use this menu to go to the Add Case screen. And from here I have a form I can fill out about the incident or case, as we refer to them in the software. I can select who the affected user was, so Iā€™ll select our example person Ted. The type, so we have them broken down into just general and injury for this particular account, but I can get more specific with these subtypes. So, Iā€™ll choose a Workplace Hazard. We also have the ability to enter in a site, and this is going to refer to the different sites in Odyssey which are also utilized elsewhere outside of the module. And a location description, if I want to get more specific I can go ahead and enter any text description as to where this incident actually occurred. The Incident date, Iā€™ll just say today. And then we have a descriptive element section. This just helps you very quickly write out what actually happened. These are prepopulated statements that we set up during implementation with different categories. So you can see there are ones that pertain to damage, contact tracing, radiation exposures, insurance information. All of these are customizable phrases you can enter in.

So, since this one here was about a Workplace Hazard, Iā€™ll actually go in and put something realistic here. Letā€™s go in and see our options for workplace hazards. There could be damage as a workplace hazard, so Iā€™ll say that there was damage thatā€™s internal and can be repaired on-site and that it is covered by insurance. So it just populates these different descriptions into here. As well as I can come in and I can also enter text if I want to. And then you can select the Save button and itā€™s going to add a case profile for you. This is where from here on out you how you go about adding information to the case and updating it during the lifetime of the event.

If I go back, Iā€™m going to go to one of our cases that we have already added because it just has more example information for us to look at here. So here is a case on Equipment Damage. I can see I was the recorder for this, it was a general incident, it occurred in Building 5, more specifically in an office. And we see that Chris Wilson here was affected.

So, down below, this is where we have two tabs, one called Evidence, and once called Responses. The Evidence tab is intended for an administrator or someone who is coming in here and initially adding the case to Odyssey. For this particular incident, we can see that it was a computer that was damaged, and we have an image of that piece of equipment that has been uploaded.

The Responses tab is intended more for the affected users, so Chris here, or any other person that might have been involved that you need to get a response from. So this would be the admin coming in and requesting a response from any affected personnel to get their feedback on the event. And Chrisā€™ response was requested, we can see that he had a response required by date of October 1st. He did come in here and respond saying that he had sent in the computer for repair. This is also a tab or area where you can come in and upload documents as well. So, if he has you know a repair document or invoice that is related to this, he can also add that to his response in this Files column.

KB 07:11: Well that seems really useful for tracking the resolution of incidents that need to be formally logged. I do have one last question though. How does the individual know when their response is requested?

Katelyn 07:19: That is another great question. We do have an alerts system that is going to be software-wide within Odyssey. And so, responses do fall into that category. You receive alerts through the Alerts and Taskbar that I just selected in the lower right-hand corner. There is an alerts section where post-it notes pop up with posted information; this is an example one about RAM Use Cards. But if you were to have your response required for a case, you would receive a notification of that via a post-it note alert like this, with text saying that your response is required and also linking to this particular case.

You can optionally also opt for email alerts. So, if youā€™re not coming into the software frequently and you still want to make sure youā€™re on top of all of those notifications you can get those emailed to your email address of choice as well.

KB 08:14: Well that sounds great! And that actually wraps up our list of frequently asked questions for the Incident Management module. Thank you again Katelyn for walking through the module with me and clarifying how users can use it to record incidents in their radiation safety or their EHS program.

Katelyn 08:29: Thanks for having me, KB.  


Schedule an in-depth demo with our Odyssey team to discuss how the software can assist you with your radiation safety management needs.

13 Oct 2021
Odyssey Inventory Tracking Module

Odyssey “How To” Series: Inventory Tracking Module

Join us for our second interview with Odyssey Implementation Analyst Katelyn Waters, where we discuss how to carry out certain functions of the Inventory Tracking module and answer some of your frequently asked questions.

Odyssey is a radiation safety software suite designed to help RSOs, EHS managers, and Radiation Safety Specialists manage affordable and efficient programs.

https://vimeo.com/622603614

KB 0:09: Welcome to part 2 of our 12-week how-to series highlighting Odyssey radiation safety software. Today weā€™re back with Odyssey Implementation Analyst Katelyn Waters to talk about the Inventory Tracking module. Weā€™ll be addressing some frequently asked questions we get about the moduleā€™s functionality and its use in tracking radioactive materials. Katelyn, can you start by explaining a little bit about the inventory tracking module and its different sections?

Katelyn 0:35: Absolutely. So let me first go ahead and select the inventory tracking module out of the 12 available modules of Odyssey here. And once I do that, weā€™re going to have six different sections to look at here. Weā€™re going to have a:

  • Master Tables section which is going to be a master list of any isotopes or compounds you might use in the organization.
  • Labs. We have a section devoted to labs that are going to house radioactive materials. Theyā€™re going to each have a profile of information.
  • Inventory holdings are going to be your unsealed sources, each with their own profile as well.
  • We have a RAM Use Card section; this is a really great way to get updates to radioactive material inventories from other users.
  • A Sealed Source section which supports leak testing.
  • And then finally we have a Lab Form section. So this allows you to very quickly fill out forms that relate to any of your labs in this module.

KB 01:30: So, for the section on labs that house radioactive materials, does the area have to be an actual lab?

Katelyn 01:36: Thatā€™s a great question. So, we have decided to use the name labs and it really could refer to an actual lab but it may not be as well. It could be an entire building, an entire site, a specific room. So really any location you can designate as a lab.

And if I go in and select this section here we can see the list of available example ones I have for this account. So you can see I have some buildings, I have some overall locations, some warehouses. So, itā€™s really flexible as to what you can put in as a lab here. And the advantage of doing so is once you add it as a lab it has its own profile, that I mentioned. And I can get to that by selecting the name of any of these here.

So if we go and take a look at Building 1, we have some general information about this building. Like, we can name what this lab is. I can give it a text or number category, a status, I can assign different individuals to it like a health physicist. Importantly, I can update the survey frequency here. And then I have these additional tabs of information. I have a tab that lists out the permits or licenses that relate to this location, maps for it. You can have multiple maps here, say if you want one for each different level of the building or if you want one for a different room.

Survey history, where I can come in and actually select any of these dates if I want more information from the survey for that date, or I can create a new one with this button.

A few other miscellaneous tabs. But the other important one that I want to make sure I point out is this inventory tab. So, this is a big benefit to this section of the module. So any of the locations that you have that house radioactive materials are going to have this tab where it will show you all of the inventory at that location. So you can see I have my unsealed RAM sources here, I have my sealed sources, and then in addition to that, it will also list out equipment and machines at that particular location. Itā€™s really nice to be able to see all of that inventory all in one place.

KB 03:36: That sounds great. So, for the materials that are stored there, does this software do automatic decay calculations?

Katelyn 03:44: Yes. Iā€™ll do an example of one of our sealed sources here. So if I come and take a look at this table we have the name of our sealed sources, a serial number for it, whatā€™s actually contained in terms of the isotope there, the owner or responsible person, if thereā€™s a permit of license thatā€™s authorizing it thatā€™ll be listed out, and then we get into some activity information. And so, when you go and add the sealed source or another radioactive material to Odyssey, to begin with, itā€™s going to ask you for the known reference date and reference activity. And so thatā€™s what these two columns are. And once that information is in the software, Odyssey is going to use those dates and activities in combination with the half-life of the isotope to always be doing current activity calculations for you on any page refresh. So, all of these are just calculated when I came to the profile here. Like I said, thatā€™s always going to be constantly updating. You can see this information in a few different places, itā€™s always going to be here on the inventory tab for the different labs, but also in those two separate sections that we already mentioned where you have your unsealed sources and sealed sources too.

KB 04:55: And if I needed to adjust or dispose of any of this material how would I go about doing that?

Katelyn 05:02: Absolutely. You can either go to one of those two sections we talked about, the inventory holdings section or your unsealed, or you can go directly to your sealed sources section. And that will allow you to see a table of different profiles for those materials. I can also just navigate there by selecting anything in these tables. Everything that is possible to be hyperlinked within Odyssey is. So if something you see on the screen has a profile you can usually select that to go to that profile. If I were to choose one of these RAM IDs itā€™s going to then load that profile of the RAM for me.

This one in particular we have the RAM profile for RAM ID 102 loaded. I can see who the owner or responsible person is, the permits or license that is authorizing it, where itā€™s at ā€“ itā€™s at building 1 hereā€”what it contains, the compound and isotope, and then all of that activity information that we previously spoke of. Once Iā€™m here, to directly answer your question KB, I have the ability to do some actions on this particular material, and those are found on these buttons in the lower right-hand corner. I can split this RAM, which is going to take this one profile and turn it into more than one, so I can have two, three as many as you want. And you can designate the activity for each of those, so this would be, you know if youā€™re actually physically splitting this material in real life, and you want that to reflect in your electronic records, you can do it that way.

You can dispose of it, which is one of the actions that you had asked about. So, if you hit this dispose button, it will prompt you to optionally transfer this to waste management. If you do have both inventory tracking and waste management modules, itā€™s really great for cradle-to-grave tracking there.

You can re-assign this material. That would be to a different owner, a different permit or license, or a different lab. Finally, the other part that you asked about was adjusting the activity. Adjust activity can be done with this button. And like I said, we are automatically calculating these activities, but if you need to manually adjust it for any reason you can do so just by hitting that button.

And anything that you change will show up on this profile as well, thatā€™s what these two fields are where you have an adjusted activity and an adjusted date.

KB 07:17: You mentioned that sealed sources are kept in a separate section for leak testing. How do I view leak test information?

Katelyn 07:24: Yeah, so in order to see that let me actually go to that separate section. Iā€™m going to back out to our main Inventory Tracking section, and this is what we had at the very beginning here of our conversation today with those six different sections. And Iā€™ll go into Sealed Sources where that leak test information is kept. Like I mentioned we do keep these separate due to those leak tests and that workflow, so from this table, I can see which of my sources need to be leak tested. Itā€™s listed in the last column of the table in the Leak Test Required column, and this information comes from when you initially add the source into Odyssey.

If I do choose one, like this one here which has an annual requirement, I can take a look at its profile and weā€™re going to have some additional information there. On any source that needs to be leak tested, there is a tab called leak test, and this tab allows you to add new leak tests if you want, but it also allows you to view any historical ones that have occurred. So, I can click on this date to get more information if I want, and it will also keep track of when the next oneā€™s due. So this one occurred in May of 2021, and if I come back to my general information tab here, I can see that my next Leak Test is going to be due May of 2022 since this does have an annual requirement. This is really nice that this is automatically going to progress for you once you log a new one on that leak test tab.

KB 08:54: Can I receive reminders for those due dates?

Katelyn 08:56: Absolutely. Thatā€™s one of my favorite features of Odyssey is that anything that has a due date associated with a sealed source, machine, equipment, those due dates can push reminders to you which show up as alerts in our system. And they have a post-it note resemblance, theyā€™re going to be in the Alerts and Tasks bar on the lower right-hand corner, and they show up in this format. And you can optionally also get email alerts. Say youā€™re not logging into this system very frequently; you can have those pushed to your email to make sure youā€™re definitely aware of those upcoming dates.

KB 09:31: And if Iā€™m being inspected or audited, or maybe I just need to look at records for materials, can I do that?

Katelyn 09:38: Yes. Thatā€™s what this History tab is that we have added here that I havenā€™t spoken about yet. The History tab is going to log any changes that occur for your material, whether thatā€™s going to be an unsealed source or sealed source. You can go back and see these examples here of this Vincent person and what changes heā€™s made and the date and time those changes were made. So if you need to go back and see when an activity change happened or where a source was, this is a great place to do that for regulatory purposes.

We also have a Documents tab, so if youā€™ve previously uploaded documents for the source that an inspector might want to see you can always find them here. Say you have a wipe test or some sort of shipment receipt label, you can put that here and always have those to reference.

Finally, say you have an inspector that requests information, but you donā€™t necessarily want to go through each profile for your sources, we do have a Reporting module which allows you to pull some comprehensive information for everything on the account, and then you can either download that as a CSV file or a PDF and email that to them.

KB 10:44: That all sounds great. And that wraps up our list of frequently asked questions for the Inventory Tracking module. Thanks, Katelyn, for walking through the module with me and clarifying how Radiation Safety Officers can utilize it to manage radioactive material in their radiation safety program. Join us next week for part 3 of our Odyssey How To series where we will be discussing the Reporting module.


Schedule an in-depth demo with our Odyssey team to discuss how the software can assist you with your radiation safety management needs.

21 Jul 2021
online radiation safety course

The Mobile Radiation Safety Software Solution for the Modern RSO

Fieldwork is an essential component of radiation safety programs. From inventorying radioactive materials, machines, and equipment, to performing audits and inspections, there exists a need to capture real-time information while on the go.

Historically, this information would be recorded on paper forms and later transcribed to an electronic record or placed in a binder. Such methods are both outdated and time-consuming. Their very nature prohibits RSOs from accessing the most up-to-date records while traveling or on-site, and keeps them from streamlining effective administrative processes within their radiation safety programs.

But with the advent of mobile-optimized radiation safety software, performing these tasks and recording the results is more efficient than ever before.

In response to the growing awareness and need for such a software solution in radiation safety, Versant Physics has developed the cloud-based software Odyssey, with mobile optimization as a core focus. Users of the software can access Odyssey on their desktop or laptop computers, tablets, and mobile phones anywhere they have an internet connection.

odyssey screenshot of sealed sources

Versant Physics’ implementation analyst, Katelyn Waters, has seen multiple Odyssey clients incorporate the software into their fieldwork.

ā€œClients frequently use Odyssey to perform on-site inventories of RAM, sealed sources, radioactive waste, machines, and equipment. They use tablets and cell phones to quickly pull up inventory records by location. From there, individual profiles can be viewed and edited on the go as needed.ā€

These inventory records are displayed as a table with a simple and searchable format convenient for reviewing information on the smaller screens of mobile devices. Tables contain links to individual profiles with buttons to easily adjust the activity of radioactive materials, update survey, inspection, or calibration due dates, or edit other profile information.

Each profile also has the option to print out a physical label for the inventory. The label can include a logo, information from the profile, free text, and a unique QR code. The QR code can be scanned to take a user directly to a profile to increase speed and accuracy during an inventory.

ā€œThe biggest benefit of the QR code system that I see is the ability to perform cradle-to-grave tracking of RAM, sealed sources, and waste containers,ā€ says Waters. ā€œUsers can scan the QR code attached to the material throughout its lifetime to view location, activity, and ownership changes to ensure that they are always accessing accurate, up-to-date information.ā€

odyssey qr code

These QR codes are available to be printed for RAM, sealed sources, waste containers, machines, equipment, and laboratories in Odyssey. Utilizing the labeling tools not only helps radiation safety staff quickly access information, but also complies with FDA and NRC labeling requirements for radioactive materials, machines, and laboratory doors.

ā€œIn addition to completing inventories, we also see our clients utilize the Forms module of Odyssey for audits, inspections, and surveys,ā€ says Waters. ā€œCustomizable forms can be created which include images like floor plans. These forms can be filled out and the images marked up using mobile devices during the inspection itself.ā€

odyssey customizable form screenshot

The forms utilized during these inspections are custom forms set up during the implementation process by the Versant Physics team, or by an administrator. The same form can be filled out repeatedly for consistency and to track changes in responses over time. This standardization of forms is an essential aspect of radiation safety for quality control.

Another important consideration for data capture is efficiency. Odyssey aims to accomplish efficient data collection by prefilling data from its other modules into the form where applicable. This reduces the amount of time spent filling out the form and helps minimize the potential for human error as existing data does not need to be copied over.

Utilizing cloud-based software has become increasingly relevant as radiation safety programs move from paper-based methods to electronic solutions. Performing work in the field itself on mobile devices aids in getting records more efficiently into this desired electronic format. Odyssey is engineered to assist with this transition to increase data accessibility, efficiency, and accuracy for radiation safety programs.

You can schedule a live demo with our software specialists to learn more about individual Odyssey modules, mobile features, and software usability.